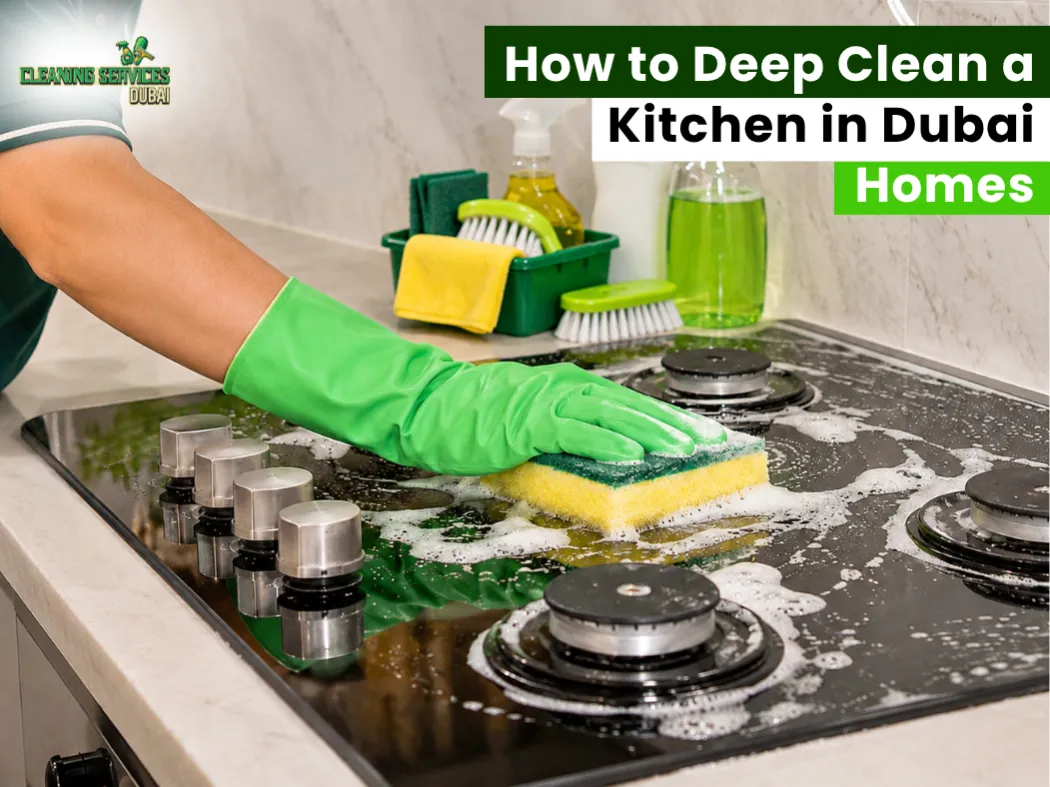
The best way to deep clean a kitchen is to work from top to bottom. Dust the ceiling and hood first, then clean the cabinets, walls, appliances, sink and countertops, and finish with the floor. Do dry tasks before wet ones so loosened dirt never lands on clean surfaces.
A clean kitchen takes more than wiping the countertops and washing a few dishes. Cooking leaves behind grease, food splashes and sticky residue that gradually collect on cabinets, tiles, appliances and other surfaces. Dust can also settle inside cupboards and around kitchen equipment, making neglected areas harder to clean. In Dubai homes, fine dust, humidity and hard water add their own challenges, from sand inside drawers to limescale on taps.
Here’s how to deep clean a kitchen: this kitchen cleaning checklist takes you through 10 practical steps to remove built-up dirt, clean overlooked areas and improve everyday kitchen hygiene.
What Is Kitchen Deep Cleaning and What’s Included?
Kitchen deep cleaning is a detailed cleaning process that reaches areas often missed during everyday maintenance. Regular cleaning usually covers visible spills, dishes, countertops and floors. A deep clean goes further by addressing accumulated grime, grease buildup, food residue and dirt hidden inside or behind kitchen fixtures.
A complete clean may cover:
- Kitchen cabinets, cupboard doors, shelves and drawers.
- Extractor hood surfaces and removable grease filters.
- Hob, oven, refrigerator and microwave.
- Kitchen walls, backsplash tiles and grout lines.
- Sink, taps, drain and surrounding surfaces.
- Countertops and food preparation areas.
- Floors, skirting boards and accessible corners.
- Small appliances and overlooked spaces.
The exact scope depends on the kitchen’s condition, materials and cleaning requirements.
How Is Deep Cleaning Different from Regular Cleaning?
Regular cleaning keeps everyday mess under control. It removes fresh spills, food crumbs, dust and visible marks before they become difficult to manage.
Deep cleaning focuses on areas that need more attention. Grease around the cooking range, dirt inside drawers, limescale around taps and grime between tiles may remain even after routine cleaning. A proper deep clean tackles these neglected areas using suitable products and methods.
Which Parts of the Kitchen Need a Deep Clean?
Pay particular attention to the areas exposed to cooking oils, moisture and frequent handling. Cabinet handles, extractor filters, appliance edges, sink fittings and tile grout can collect dirt without being immediately noticeable.
In Dubai homes, fine dust may also settle on shelves and inside storage spaces. Humidity around poorly ventilated areas can contribute to moisture problems, especially beneath the sink. These areas deserve attention during a detailed clean.
What You’ll Need Before You Start
Good preparation makes the work easier to complete. Gathering the right cleaning products and tools beforehand also prevents unnecessary interruptions.
Keep these supplies ready:
- Microfibre cloths and separate cleaning cloths for different areas.
- Soft sponges and non-abrasive scrubbing brushes.
- A small brush or old toothbrush for grout and corners.
- A suitable kitchen degreaser.
- Dishwashing detergent and an appropriate all-purpose cleaner.
- A pH-neutral cleaner for compatible delicate surfaces.
- A bucket, mop and vacuum cleaner.
- Protective gloves and clean towels.
- A food-safe sanitiser suitable for the intended surface.
Always read product labels and follow the manufacturer’s instructions. Test an unfamiliar cleaner on a small, hidden area before using it across a larger surface. Keep food, utensils and children away from cleaning chemicals. For gentler options, see our guide to natural cleaning products.
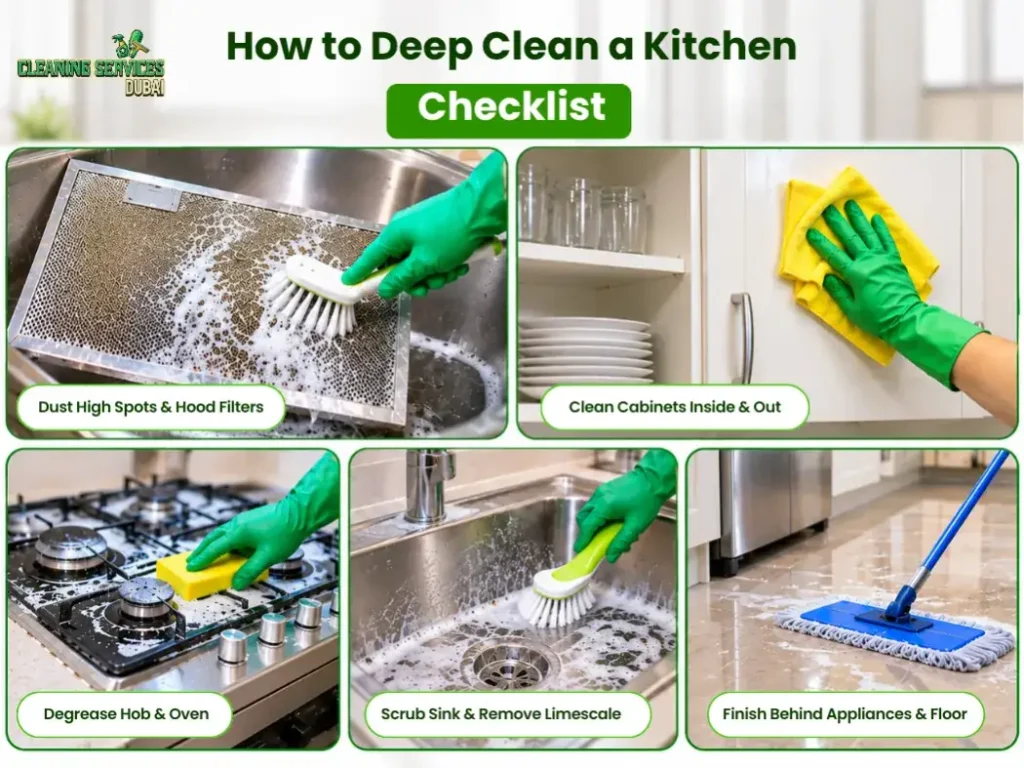
How to Deep Clean a Kitchen: 10-Step Checklist
Follow this kitchen deep cleaning checklist in order. Starting with preparation and high-level areas prevents dust and loosened dirt from settling on surfaces you have already cleaned.
1. Start by Clearing Out Your Kitchen
Begin by removing anything that blocks access to the surfaces you need to clean. Put dishes away, clear the countertops, empty the rubbish bin and remove loose items from shelves. Wash the bin and let it dry before putting in a new liner.
Take food products out of cabinets you plan to clean. Check expiry dates and place usable items in a clean, dry area. Remove crumbs and loose dust with a vacuum attachment or dry microfibre cloth.
This is also a good time to inspect the kitchen. Look for sticky cabinet handles, grease around the hob, marks on the backsplash and dirt around appliance edges. Identifying these areas early helps you plan the work.
2. Dust the High Spots, Then Tackle the Hood and Grease Filters
Dust kitchen ceilings, accessible light fixtures, upper cabinet surfaces and ventilation covers before moving to lower areas. Use a suitable duster or microfibre cloth, taking care around electrical fittings.
The extractor hood deserves special attention because cooking releases oil particles that settle on its exterior and filters. Over time, these deposits form stubborn grease that ordinary wiping may not remove.
To clean the hood:
- Switch off the appliance before cleaning.
- Wipe its exterior with a suitable degreasing solution.
- Remove accessible filters according to the manufacturer’s instructions.
- Clean removable metal filters using an approved method.
- Rinse if the product instructions require it, then dry completely before refitting.
Kitchen grease filters need regular attention because accumulated oil can affect airflow and contribute to unpleasant cooking smells. Do not assume every filter is washable; some designs require replacement.
For heavily soiled extraction systems, professional kitchen hood cleaning may be more suitable. Internal ductwork can require specialist access and equipment, so kitchen duct cleaning should be assessed separately rather than treated as an ordinary household task.
3. Deep Clean Your Kitchen Cabinets, Inside and Out
Cabinets collect dust, cooking residue and fingerprints. The problem can be more noticeable around handles, doors and cupboards near the hob. In Dubai, fine sand also settles inside drawers and shelves.
Empty one cabinet section at a time. Remove loose crumbs and dust, then wipe shelves, corners and cabinet interiors using a cleaner suitable for the finish.
For greasy cabinet doors:
- Apply a compatible cleaner to a cloth rather than soaking the surface.
- Wipe around handles, edges and frequently touched areas.
- Use a soft sponge for stubborn residue.
- Remove cleaning product residue as directed.
- Dry the surface with a clean cloth.
Wood, oak, painted and laminate cabinets may react differently to moisture and cleaning products. Avoid aggressive scrubbing and excess water, especially around joints and exposed edges.
If you are wondering how to clean kitchen cabinets without damaging their finish, always check the cabinet manufacturer’s care instructions first. A gentle, surface-compatible cleaner is usually a safer starting point than a harsh degreaser.
4. Wipe Down Kitchen Walls, Tiles and Grout
Cooking splashes often land on the wall behind the hob and around the preparation area. Grease can create a sticky film that attracts dust and becomes harder to remove over time.
Start by dusting the wall and backsplash. Apply a suitable cleaner to a microfibre cloth or sponge, then work in manageable sections. Avoid saturating painted walls or scrubbing delicate finishes.
To clean kitchen tiles, use a tile-compatible product and a soft brush where necessary. Pay attention to grout lines because dirt can settle in their textured surface.
Avoid abrasive pads on painted surfaces because they can remove the finish or leave visible marks. Do not use acidic products on natural stone tiles or grout unless the manufacturer confirms they are safe.
5. Cut Through the Grease on Your Hob and Oven
The hob and oven are among the most demanding parts of a kitchen clean. Cooking oils, burnt food and carbon deposits can build up around burners, knobs, oven racks and glass doors.
For the hob:
- Switch off the appliance and let it cool.
- Remove compatible detachable parts.
- Apply a suitable kitchen degreaser.
- Clean around burners, knobs and edges carefully.
- Wipe away residue and dry the surface.
For the oven, follow the appliance manufacturer’s instructions. Clean removable racks and trays with an approved product, and use an appropriate oven cleaner where permitted. Avoid applying chemicals to heating elements, electrical components or surfaces excluded by the manufacturer.
A good kitchen grease remover can loosen oily deposits, but the product must match the surface. Using a harsh cleaner on the wrong finish can cause damage.
For heavily burnt-on grease, professional oven cleaning may be the safer option.
6. Freshen Up the Fridge and Microwave
Refrigerators need more than an occasional wipe of the door. Food spills can collect on shelves, inside drawers and around rubber seals.
Remove food and detachable shelves where the manufacturer allows it. Clean the interior with an appropriate product, paying attention to corners, shelf supports and door compartments. Dry all components before putting them back.
For the microwave, remove the turntable and clean the interior walls, ceiling and door edges. Food splashes can harden around these areas, so use a compatible cleaner and a soft cloth.
Do not spray liquid directly into ventilation openings, controls or electrical components. Clean the exterior with a suitable cloth and dry it before reconnecting or using the appliance.
For more appliance-specific instructions, visit our guide on how to clean kitchen appliances naturally.
7. Don’t Forget the Small Appliances
Small appliances can collect crumbs, oil splashes and dust around their surfaces. Toasters, kettles, coffee machines and other frequently used equipment should be included in your cleaning routine.
Unplug appliances before cleaning. Remove detachable parts where permitted and wash them according to the manufacturer’s guidance. Wipe the exterior with a lightly damp cloth and make sure everything is fully dry before reconnecting.
Never immerse electrical appliances in water or allow liquid to enter openings, switches or power connections. Pay attention to toaster crumb trays, kettle bases and coffee machine drip trays because residue can collect in these overlooked areas.
8. Scrub the Kitchen Sink and Clear the Drain
The sink handles food residue, dirty dishes and frequent water contact. It can develop stains, unpleasant smells and mineral deposits if it is not cleaned properly.
Remove food debris from the strainer and clean the sink bowl using a product compatible with its material. Pay attention to the tap base, handles, overflow and surrounding edges.
Choose a cleaning method that suits your sink’s finish. Stainless steel, porcelain and composite sinks may require different products and tools.
Hard water can leave mineral deposits around taps and faucet heads. Use a suitable descaling product if the manufacturer permits it. Avoid mixing cleaning chemicals, and never combine bleach with vinegar or acidic descalers.
Open the cabinet under the sink and check for damp, leaks or signs of mould. Dubai’s humidity can keep this area moist, so wipe it dry and leave the door open for a while to let it air out.
Check the drain opening for visible debris, but avoid dismantling plumbing unless you know how to do so safely. Read our guides on how to clean a sink drain and how to clean a porcelain sink for more detailed advice.
9. Clean and Sanitise Your Countertops Safely
Countertops are used for food preparation, serving and everyday kitchen tasks. They need careful cleaning because the wrong chemical or abrasive tool can damage the finish.
Remove crumbs and loose debris first. Wipe the surface with a compatible cleaner, paying attention to edges, joints and the area around small appliances.
Different materials need different care:
- Marble: Avoid vinegar and other acidic cleaners because they can etch natural stone.
- Granite: Use a stone-safe cleaner recommended for the finish.
- Quartz: Follow the manufacturer’s guidance and avoid harsh chemicals.
- Laminate: Use a mild compatible cleaner and avoid excess water around seams.
- Stainless steel: Wipe with the grain where applicable and use a non-abrasive cloth.
After cleaning, use a suitable food-contact surface sanitiser when required. Follow its label for dilution, contact time and rinsing instructions. Cleaning removes visible dirt; sanitising is a separate process intended to reduce microorganisms on suitable surfaces.
10. Finish Behind the Appliances and on the Floor
The final stage is for the areas that are often missed during everyday cleaning. Check accessible spaces behind and beside appliances, cabinet edges, skirting boards and corners.
Move appliances only when it is safe to do so. Heavy refrigerators, gas appliances and connected equipment should not be pulled out without the right precautions. Keep water away from electrical sockets, cables and appliance connections.
In Dubai, crumbs and grease behind the fridge and cooker attract cockroaches, so clean these spots every few months. If you already see signs of pests, book pest control before your deep clean.
Once the upper surfaces and hidden areas are complete, remove loose dust and crumbs from the floor. Mop using a cleaner suitable for the flooring material. Give extra attention to grout lines, corners and areas around the cooking range.
Avoid flooding the floor or leaving standing water. Excess moisture can affect grout, laminate, wood and other sensitive finishes. Rinse when required and allow the surface to dry fully. For gentler methods, see our guide on how to clean floors naturally.
How to Remove Stubborn Kitchen Grease
Grease is difficult to remove because cooking oils mix with dust and food particles, forming a sticky layer on nearby surfaces. It commonly collects around the hob, extractor hood, cabinet doors and backsplash.
The right kitchen grease removal method depends on the type of surface and how much residue has accumulated. A suitable degreaser can loosen deposits, while a soft brush or microfibre cloth removes the residue without unnecessary abrasion.
Why Does Kitchen Grease Keep Building Up?
Cooking releases tiny oil droplets that settle on nearby surfaces. Without regular cleaning, these deposits attract dust and become more difficult to remove. Poor ventilation can also allow cooking residue to settle around the hood, walls and upper cabinets.
How to Pick the Right Kitchen Grease Remover
Choose a product designed for the surface you are treating. Check whether it is suitable for painted cabinets, stainless steel, tiles or other materials. Follow the recommended dilution and contact time, then rinse or wipe as directed.
A stronger product is not automatically a better choice. Heavy-duty degreasers may damage delicate finishes if used incorrectly.
Grease Cleaning Mistakes That Make Things Worse
Avoid these common mistakes:
- Scrubbing delicate surfaces with abrasive pads.
- Applying degreaser without checking material compatibility.
- Leaving chemical residue on food preparation surfaces.
- Mixing bleach, vinegar or other cleaning chemicals.
- Using the same dirty cloth across multiple kitchen areas.
- Ignoring hood filters and cabinet edges.
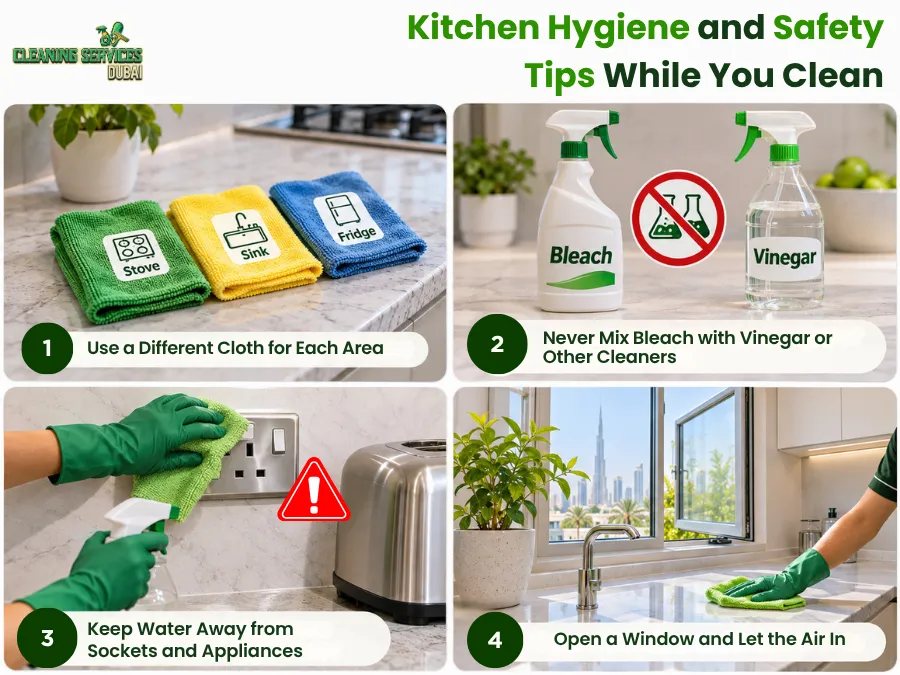
Kitchen Hygiene and Safety Tips While You Clean
A clean-looking kitchen should also be hygienic and safe to use. Good cleaning practices reduce the chance of cross-contamination and prevent avoidable damage to appliances and surfaces.
Use a Different Cloth for Each Area
Use separate, clearly identified cloths for kitchen surfaces, bathrooms and floors. Never use a cloth that has cleaned a bathroom or floor on a food preparation surface.
Wash reusable microfibre cloths after use and allow them to dry properly. Replace damaged or heavily soiled cloths rather than spreading dirt around the kitchen.
Never Mix Bleach with Vinegar or Other Cleaners
Mixing bleach with vinegar, acids or ammonia-based products can release dangerous gases. Use one cleaning product at a time and follow the label carefully. Rinse surfaces when instructed before using a different product.
Keep Water Away from Sockets and Appliances
Avoid spraying water near sockets, switches and electrical connections. Unplug appliances before cleaning where appropriate, and use a damp rather than dripping cloth around external electrical components.
Open a Window and Let the Air In
Ventilate the kitchen when using cleaning products. Follow product safety instructions, especially when working with stronger degreasers or oven cleaners.
Kitchen Deep Cleaning Schedule: What to Clean Daily, Weekly and Monthly
A consistent kitchen cleaning routine prevents grease, food residue and dirt from becoming difficult to manage. A simple schedule also makes larger cleaning sessions less demanding.
| Frequency | Recommended tasks |
|---|---|
| Daily | Wash dishes, wipe food spills, clean countertops, clear the sink and empty rubbish |
| Weekly | Clean the hob, sink, floor, handles, cabinet fronts and appliance exteriors |
| Monthly | Clean selected cabinet interiors, refrigerator shelves, microwave interior, grout and accessible hidden areas |
| As needed | Deep-clean hood filters, remove heavy grease, treat limescale and clean behind movable appliances safely |
The right frequency depends on cooking habits, household size, ventilation and how heavily the kitchen is used. Homes that cook frequently may need more regular attention around the hob and extractor hood.
Tricky Kitchen Cleaning Situations (and How to Handle Them)
Some cleaning jobs need additional care because the surface, contamination or previous treatment creates specific risks.
How to Clean Kitchen Cabinets After Pest Control
After pest control, follow the pest-control provider’s instructions before cleaning treated areas. Respect the stated re-entry time and any restrictions on wiping surfaces.
Once cleaning is permitted, remove exposed food and disposable packaging. Clean shelves, cabinet interiors and food-contact surfaces using a method suitable for the material and the treatment instructions. Use clean cloths and avoid mixing cleaning products with pest-control chemicals.
If you are unsure which areas can be wiped or which products are safe to use, contact the pest-control provider before starting.
How to Deep Clean a Very Dirty or Greasy Kitchen
A very dirty kitchen needs a planned approach. Start by removing rubbish, dishes and loose food debris. Work on high surfaces first, then cabinets, appliances, walls, countertops and floors.
Allow suitable cleaners the recommended contact time, and repeat treatment only when the product instructions permit it. Avoid trying to remove thick grease with excessive force because this can scratch or damage surfaces.
For severe grease deposits, inaccessible extraction areas or extensive neglected grime, professional equipment and experience may be more appropriate.
Restaurant Kitchen Deep Cleaning Checklist
Commercial kitchens face heavier use and more demanding hygiene requirements than most home kitchens. A restaurant kitchen deep cleaning checklist may include:
- Cooking ranges, ovens and preparation equipment.
- Extractor hoods and grease filters.
- Food preparation surfaces and storage areas.
- Floors, grout, wall surfaces and corners.
- Sinks, drains and waste areas.
- Accessible ventilation components.
Commercial cleaning should follow the business’s food safety procedures, equipment instructions and applicable local requirements. Residential cleaning methods should not automatically be treated as suitable for commercial kitchens.
How Long Does It Take to Deep Clean a Kitchen?
The time needed depends on the kitchen’s size, condition and the number of appliances and storage areas that need attention. A small kitchen with light grease buildup will usually require less work than a large kitchen with neglected cabinets, heavily soiled filters and stubborn stains.
The main factors include:
- Kitchen size and layout.
- Amount of grease and accumulated grime.
- Number of cabinets, drawers and appliances.
- Condition of tiles, grout and flooring.
- Accessibility of the hood and other equipment.
- Whether cleaning requires additional specialist work.
Preparing supplies and working in a logical order can make the process more efficient. Rushing through important areas, however, can leave chemical residue or hidden dirt behind.
When Is It Time to Call Professional Kitchen Cleaners in Dubai?
Some kitchen cleaning jobs are difficult to complete with everyday household products. Heavy grease, stubborn grout stains, neglected cabinet interiors and hard-to-reach extraction areas may need more time, suitable equipment and specialist cleaning methods.
Professional kitchen cleaners can assess the condition of the surfaces and choose appropriate methods for the work required. This is especially useful when a kitchen needs a detailed clean before moving into a property, after a long period of heavy use or before an important inspection.
If your kitchen needs more than a weekend scrub, the team at Cleaning Services Dubai offers kitchen deep cleaning in Dubai, including cabinet interiors, hood filters and tiles. You can enquire about the cleaning requirements, areas to be covered and the equipment needed before arranging a visit.
Questions to Ask Before You Book a Kitchen Cleaning Company
Before confirming a service, ask clear questions about the work included:
- Are cleaning products and equipment provided?
- Are cabinet interiors and drawers included?
- Are separate cloths used for kitchen, bathroom and floor cleaning?
- Are hood filters, appliances and grout included in the agreed scope?
- Are any additional charges confirmed before work begins?
- Will the team check the completed areas before leaving?
A clear scope helps prevent misunderstandings and makes it easier to assess the result.
Frequently Asked Questions About Kitchen Deep Cleaning
What Is the 5-5-5 Rule for Cleaning?
The 5-5-5 rule is an informal tidying tip, not a formal cleaning standard, and people describe it in slightly different ways. A common version is to spend five minutes putting away five items in five different areas. In the kitchen, it works well as a quick daily reset, but it does not replace a deep clean.
What Are Five Hygienic Practices in the Kitchen?
The World Health Organization’s Five Keys to Safer Food are a widely used guide: keep clean, separate raw and cooked food, cook food thoroughly, keep food at safe temperatures, and use safe water and raw materials. In practice, that means washing your hands and food-contact surfaces, using separate cloths and chopping boards, and storing food properly.
What Is the Fastest Way to Clean a Kitchen?
Clear the counters first, keep your supplies in one place and work from top to bottom in one zone at a time. A quick daily wipe of spills and countertops also makes every deep clean faster.
What Are the Disadvantages of Deep Cleaning?
Deep cleaning takes time and effort. The wrong products or tools can damage surfaces, strong chemicals need good ventilation, and moving heavy appliances can be risky. Checking product labels and working carefully avoids most of these problems.
Can You Deep Clean a Kitchen in One Day?
Most home kitchens can be deep cleaned in a day with good preparation and a clear order of work. Kitchens with heavy grease, many cabinets or neglected appliances may need longer or a team to finish properly.
How Much Does Kitchen Deep Cleaning Cost in Dubai?
The cost depends on the kitchen’s size, condition and the areas included in the scope. For current rates and what each package covers, see our deep cleaning prices in Dubai, or request a quote with photos of your kitchen.
